The cutest blog on the block black and white background

Thursday, March 31, 2011

We heart PEEPS!

Peighton shares my love for peeps.
We both get excited when we see them in the store!

Today, we decided to make "Peep Pops."
I've seen this done in several different ways on many different blogs.
They are adorable no matter how you do it!

We made Rice Krispie Bars and cut them into squares after they cooled.
Then I sliced a Peep in half....and we proceeded to eat the backside of each peep....

I melted some pink chocolate leftover from another project and we used that as our "glue" to stick the Peep to the Rice Krispie.
And of course, nothing is complete without sprinkles around here!
We put sticks in them just for fun but they could be made without.

She sprinkled until she thought they were "cute enough."

And here's what we got!


Super cute.
And of course super yummy!


Wednesday, March 30, 2011

Cosmo Anyone?

Great name for a bag, huh?

Although, the drink is one of my favorites too!


I have had this wonderful book for quite awhile:

And I just haven't had the time to make many of them yet!
I think I could start at the beginning and make every single one of them.

The one on the cover is what sold me on the book-I ADORE IT.

It's called the Cosmo bag.
It's big and roomy and pretty and has lots of pockets.
Perfect.

On a recent trip, my friend Amy had an adorable one and she totally inspired me to get to work on it!

And I was thinking of Cosmos the whole time...

I chose fabrics that I already had on hand.
REALLY trying hard to destash this joint!

I had just enough of the teal Amy Butler print and then had a random orange and pink one for the handles.
I LOVE how it turned out!
I like large prints on bags and this one did not disappoint.

It's got lots of room and lots of pockets.

And it just happens to match one of my previous creations:


I also made a little zippered pouch out of the leftovers!
I don't have a picture of that though so I'll save it for another day.
This bag is going to be super organized.

In a few weeks I am going on a trip without the short ones.
And since I am still nursing that means I get to haul along my little friend Ameda...aka the breast pump.
I think this bag will work well to carry it all through the airport and still look cute!


Next on my list out of this book is the "Take Flight" handbag.
It looks gorgeous.
And hard.
We'll see how that goes!

Tuesday, March 29, 2011

10 minute fabric necklace

In addition to painting, Peighton loves to accessorize. 
Rings, necklaces, earrings (fake ones), high heels, you name it she likes to wear it-and all at once.

I am always on the look out for more accessories to keep her happy!

I came across this tutorial and I had everything to make it from leftovers of other projects! 
Score.
I love when I can just go to my craft room and find everything I need without going to the store at all.

It took me about 10 minutes start to finish and that was with Peighton helping to stuff the beads in.
She likes to be in on projects whenever possible and I am always happy to have a helper!

Here is what ours looks like:


I did not do the ribbon as the original tutorial has. I wanted Peighton to be able to put it on and take it off by herself.  So I just added a few quick snaps and we were done!
Now, she wants one for Nellie-her American Girl. 
Maybe tomorrow. ;-)

Monday, March 21, 2011

Ridin In Style

Not much time for the crafty betweeen a few crazy trips-but here is a quick one...


Ridin in style....at Target, that is!

Preston is finally getting to the point where he can sit up in shopping carts.
Dirty, disgusting, who knows who sneezed their boogers on it last shopping carts.

Since he is pretty much always with me and we have a need to go to Target, the grocery store, Joanns, Hobby Lobby, you get the idea, we need something to keep his mouth off the cart!

So, I pulled out the pattern I used when Peighton was this age and whipped up a cart cover.

There are quite a few different patterns for this out there. The one I have is Simplicity 4225.
Super easy and very quick to make.

I found this fabulously cute argyle at Hobby Lobby and it made the perfect cart cover!
Peighton's was pink leopard print and it was cute....but I think I like this one better!

I added some orange ribbon tags in the front for him to either chew on or to attach toys to for those trips that I know are going to take awhile. 

You can't see it very well but there is a hole in the front where his legs stick out.

We can't wait to use it!

Monday, March 14, 2011

Here Comes Peter Cottontail!

I can barely contain my excitement.

This just arrived on my doorstep:

A handcarved sewing machine!
And parts of it actually move!
Sorry for the terrible picture but I had to be super quick and very sneaky to even open the box!

Oh I cannot wait for Easter to come!

I found it while searching HERE on etsy.

She is going to love it.
I cannot wait for the pretend play that comes out of this one!


Friday, March 11, 2011

Soft Stacking Baby Blocks

Before Preston was born, I made adorable stacking blocks from the leftover fabric I did his room in.

They are 5 sided so that they can be stacked inside one another, on top of one another, etc.
They also have cute little ribbons on the tops for chewing, grabbing, gnawing on...

As I was making them I pictured him and his sister spending time stacking them up and then knocking them down.
I pictured her showing him how they all fit inside one another;
putting them in order from biggest to smallest;
filling them with all sorts of treasures.


Last night at story time the blocks were brought out from their basket.
And here is what took place:


They became helmets for both of my sweet babies as thier daddy flung fabric blocks at them!
This was one thing I did NOT envision!

But everyone was laughing, dodging the blocks and having a great time.


Guess this is what happens when Daddy is home for story time!


Tuesday, March 8, 2011

Make Your Getaway Duffle!

I love bags.

Doesn't matter what kind.
Big.
 Little.
Wide.
 Tall.
Ruffley. 
Sparkley.
Diaper bag.
Clutch.
Handbag.
Purse.

You get the picture.

So, when I saw this duffle bag pattern I was in love!!!!!
I went to work immediately!
Ok, after I went to the store and bought the 24" zipper.


I used some of my favorite Amy Butler LOVE Home Decor fabric. 
I've had it for awhile and just didn't know what to do with it.
Maybe my fabric hoarding isn't such a bad thing!

It turned out FABULOUSLY!!!!!


I did add "D" rings to the sides to make a shoulder strap-this was not in the pattern, but I think I will find it useful when I tote this around.
The strap is not in the picture though because I forgot to buy the hooks when I was at the store!
Oh well.


And let's just take note of my fantastic zipper installation below!!!!!
YAY ME!
I may or may not have had to rip out a seam or two while perfecting this but the point is I did a fabulous job on it!
 
The bag is fully lined on the inside with a cotton print (forgot to take a picture of that!).
I did not use any interfacing though.
It's pretty sturdy since I used Home Dec fabric on the outside.
I wanted it to be very lightweight, packable and foldable for the upcoming trips that we are going on.
Sometimes I think interfacing just adds unwanted weight.
 
There is also a smaller size included in this pattern that I am going to make next.
I think it would make a cute little set for traveling!
 
The pattern was very easy, didn't have a lot of pieces and seemed to have good directions.
I will admit I did it my own way once the pieces were cut out. 
I just can't seem to follow directions-makes me wonder how I was ever a teacher!!!!
 
I did the zipper differently aka...my own way!
But I'm sure following her directions would have been just fine.
 
I would highly recommend trying out this pattern-it is really cute and I can't wait to use it...and make another one!


Monday, March 7, 2011

stroller drink holder

I love my stroller.

Peighton likes to call it
The Big Mac.
It seats two.  It's pretty lightweight for a double stroller. It folds up easily.

Both my four-year-old and my baby are comfy in it.
They sit beside one another and she hands him toys, puffs, cheerios and his paci when needed.

It's great.

But those crazy folks at MacLaren didn't think it needed a cup holder!

They obviously didn't ask any mommies.

One of my other strollers has FOUR cup holders-now that is my kind of design! Plenty of room for the baby's snacks, drinks and mine too!

I found this stroller drink holder tutorial and thought it might just work.

It was super easy and took maybe 15 minutes start to finish.
I used my snap press for the snaps.

The handle is not crooked, it's just sitting there funny!

I thought about taking it out and putting it on the stroller for a picture.
But my garage is cold and dirty from all the snow melty stuff that collects on the floor.
So, I took this picture on my floor and I am going to sit here in my nice warm house and picture my drink holder on my stroller during those warm summer days when I will actually need it!

Friday, March 4, 2011

String cheese sticks

Who doesn't love string cheese, wrapped in Bisquick and dipped in sauce?

YUM.

Super easy and super yummy, according to Peighton.

String Cheese Sticks
2 1/4 cups Bisquick
2/3 cup milk
1 pkg string cheese
1 T butter, melted
1/4 t garlic pwd.
1 can pizza sauce

Heat oven to 450.
Stir Bisquick and milk until soft dough forms; beat 30 seconds.
Place dough on surface sprinkled with Bisquick; gentlyl roll in Bisquick to coat.
Shape into a ball; knead 10 times.

Roll dough 1/4 inch thick.
Cut into eight 6 x 2 inch rectangles.
Roll each rectangle around 1 piece of cheese.
Seal the ends.
Place on greased cookie sheet with seam side down.

Bake 8-10 minutes or until golden brown.
Microwave the butter and garlic powder.
Brush over warm cheese sticks.
Serve warm with sauce!

I forgot to take a picture of these before we ate them all up!
Guess you'll have to make them to see what they look like!

Thursday, March 3, 2011

Camera Bag...or so I thought

I bought this camera bag pattern awhile back and just hadn't gotten around to making it.

I came across it today and thought I should try it out!
Remember how I am trying to use up my fabric stash? I keep trying to find things to make and this was one of them!

I thought it would be quick and simple, being a small bag.
And it was, now that I look back on it.

But I'm not one that likes reading directions...so my seam ripper had to come out a few times.
Note to self....read directions more often!

Anyway, it turned out great.

I added a little flower rosette on the front because I seem to be into those lately.


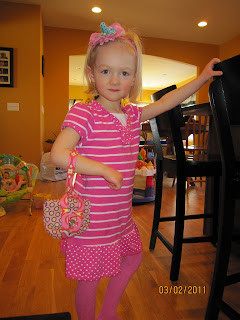
And when my happy little helper saw it...she decided it was hers!
She told me it was her "fancy purse."
How can I argue with that?
She wears it well.
 
She was right-it does make an adorable little purse just her size!

Guess I'll be making another one...

Wednesday, March 2, 2011

A Tiny Clutch-for me!

When I bought this pattern from The Tiny Seamstress I also bought two others....you know, to save on shipping.

One of them was The Tiny Clutch Pattern.
Super cute.

I tried it out today and it was so quick and simple!

I am trying really hard not to buy any NEW fabric right now and just using what I've got.
(And I've got a lot...it might take me awhile and a lot of projects!)

I used some of my favorite Amy Butler fabrics.
Here is what mine looks like:


 I think it might make a fabulously cute diaper and wipes bag....for those times when I am living my super glamourous life and have to wipe someone's hiney!
It seems to be about the same size.

I also think it needs a sweet fabric rosette added to the clasp.
I had this one laying on my table:

It doesn't really  match (it is actually going on a headband for Peighton) but I just wanted to see what it would look like and I LOVE it!
So, I am going to make one to match and it will look a lot better-Peighton would be sad if I took hers anyway!

My friend, Erin, has a very crafty blog and she had her own take on the Tiny Clutch pattern.
Check it out here!

Love the patterns from The Tiny Seamstress!
The two I have done have been very easy to follow and pretty quick to assemble.

Tuesday, March 1, 2011

I can! I CAN sew for boys!!!!

So many friends with sweet little boys are always asking....

"When are you going to start doing boy stuff?"

Well, boy stuff is HARD!

It's so easy to do girly stuff.
Fabric is girly.
Ribbon, lace and ruffles are girly.
Not to mention fun.
The boy stuff I have tried in the past has usually ended up looking like something girly...but in blue!
Or with airplanes, robots, tractors...you get the idea!

But today, I made some adorable jammies for my little guy.
And they are cute.
Surprisingly easy too!


I would have liked to use a contrast fabric for the cuffs and the neck trim but I didn't have any today!
And since I decided to do this project about 5 minutes before naptime there just wasn't any time!!!
So I just used the same fabric for the trim.

I did have a tiny bit of brown ribbing that I used for the waistband so I didn't have to do an elastic waistband and I really like how that turned out!
I think it will be quite comfy too.
Wish I would have had more of the ribbing-just another reason to head to the craft store.


I like this style of shirt a lot for little ones.
Since there isn't an actual neck it makes dressing them so easy.
Preston HATES to get dressed/changing clothes, etc.
He does not like things pulled over his head.
I think this  might make it just a little bit better for him!

This was my trial run.
 I have many more to make seeing as how my little man is getting low in the jammie department!
Next time I will take pictures and make a little tutorial-it was really quite easy and I would love to share!

As I was making it I was thinking of all the ways it could be super girly too.
Wouldn't a tiny little ruffle be adorable in the seam between the leg cuff and the leg!
Sure would!