The cutest blog on the block black and white background

Showing posts with label tutorial. Show all posts

Thursday, April 7, 2011

Baby crib toy


The inspiration for this came from my favorite magazine, Stitch.  I liked the idea, but the one they made was quite girly, a flower, lady bug, etc. I thought I could boy it up a bit for Preston!  He is the kind of baby who likes to talk to himself, touch things, chew on his hands etc to put himself to sleep so I thought this was the perfect thing for him!

I made this entirely out of my scrap box.  I wish I had more of the fabric I did his bedding in though because it could have matched that! 

It really didn't take a lot of fabric.

Supplies:
large and small scraps of fabric
ribbon scraps

I started out by cutting 3 rectangles of fabric. Mine were 9" x 7".  I used some flannel and some quilting cotton to cary the textures.
I also cut 6 straps 10" x 3 1/2".

Then I used templates for my shapes from Homemade By Jill. I had used the elephant and the alligator before to make little tag animals and thought they would be the perfect size for this too!  She also had a car I used.  There was also a barn on there that I thought could be super cute, but I am going to use that for a different project!

So, I cut my shapes, and embellished them just a bit.  The elephants ear has some crinkly plastic in it, as well as a ribbon tail, the alligators feet are ribbon and the car's wheels are a different fabric than the car.  I used minky for the alligator too.  I tried to use different colors, textures, shapes and tags wherever possible.
See my picture below.
Had this not been for a baby I would have gone crazy with the embellishments but I didn't want a choking hazard!
Once I had all my shapes ready I stitched them down with a zig zag stitch.  I added a black ribbon "road" under the car too.


I stitched my blocks together, then pressed the seams. 


Next, I cut a piece for the back-I had a big chunk of yellow so that's what I used, love my scrap box!
I used my front piece laid on top of the yellow fabric to make the right size for the back.

I also sewed together my ties.  I ironed 1/2" along each of the long sides, then folded them in half and stitched down the open side.

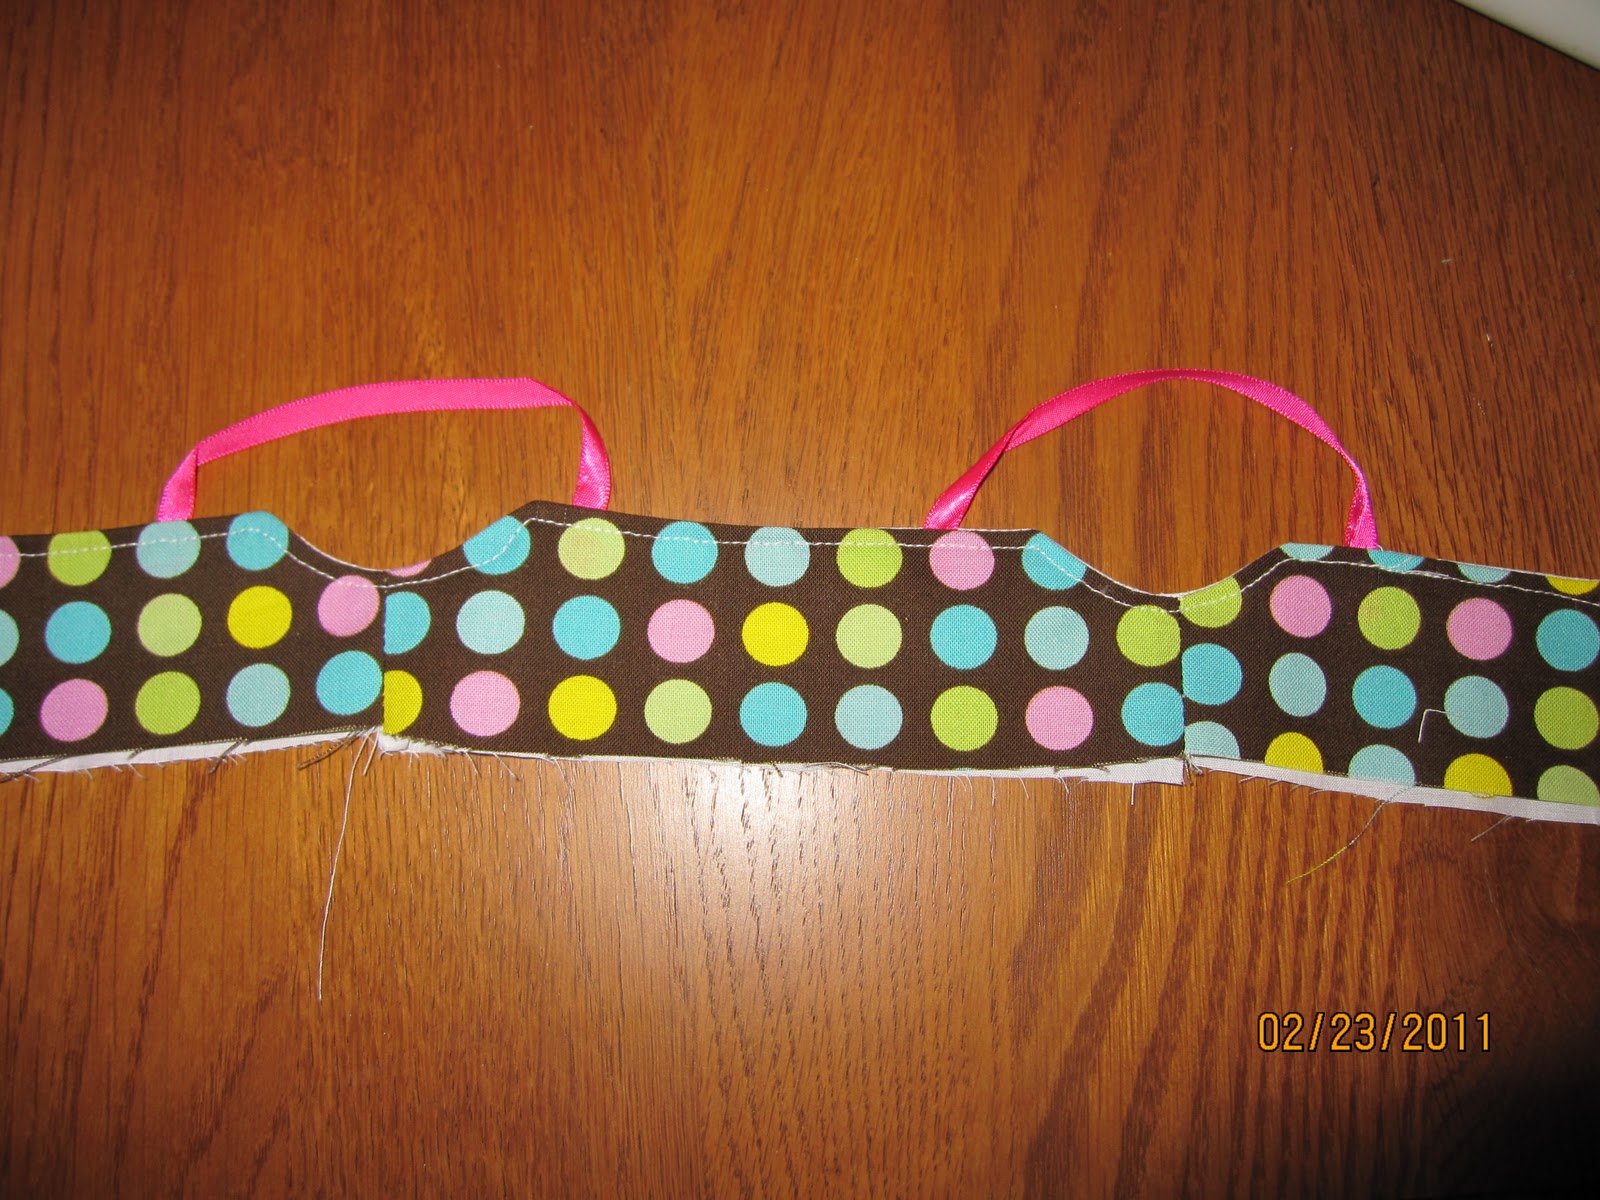
Next, I put my ties in place.  A pair on each outer corner and one in the center. (See picture below).
I also added some more ribbon tags to the bottom of it.  Just one more  place to put a few fun textures for the baby!

Then, I put right sides together and pinned along the outer edge all the way around.
I stitched around the outer edge, leaving an opening for turning.


Then I turned it right side out, pressed it and topstitched the opening closed.

I love the way it turned out and the fact that it's not quite so girly as the one I originally saw!

Monday, March 7, 2011

stroller drink holder

I love my stroller.

Peighton likes to call it
The Big Mac.
It seats two.  It's pretty lightweight for a double stroller. It folds up easily.

Both my four-year-old and my baby are comfy in it.
They sit beside one another and she hands him toys, puffs, cheerios and his paci when needed.

It's great.

But those crazy folks at MacLaren didn't think it needed a cup holder!

They obviously didn't ask any mommies.

One of my other strollers has FOUR cup holders-now that is my kind of design! Plenty of room for the baby's snacks, drinks and mine too!

I found this stroller drink holder tutorial and thought it might just work.

It was super easy and took maybe 15 minutes start to finish.
I used my snap press for the snaps.

The handle is not crooked, it's just sitting there funny!

I thought about taking it out and putting it on the stroller for a picture.
But my garage is cold and dirty from all the snow melty stuff that collects on the floor.
So, I took this picture on my floor and I am going to sit here in my nice warm house and picture my drink holder on my stroller during those warm summer days when I will actually need it!

Thursday, February 24, 2011

DIY American Girl sundress

Here is our favorite little friend, Nellie, once again.
Like our other friend, Peighton, she "only wears dresses."
Good thing Peighton's mommy can whip one up in no time!


Making clothes for the American Girl dolls is pretty simple and most importatly QUICK!
This dress is no exception-perfect for a beginner and for sure a child learning to sew could help with as well.
I think this will be one of the first things I help Peighton make....in a few years, she's not so good with real scissors yet!

 The dress in the first picture and the one I made below both came out of my scrap box too, so it's a great way to use up random cute scraps!
SUPPLIES
1/4 yard for the skirt
scraps for the chest
scraps of ribbon for the straps
1/8 yard for the bottom of the skirt
Scraps of white/plain fabric for the chest lining
About 8" of velcro (snaps could also be used)

Like I said, most of this can come out of scraps, but you may need to buy a fat quarter for the skirt.
Or, it's always fun to take a child to the fabric store and let them design it themselves...Peighton usually just gets to go to my scraps!
Although she did pick out the bunny fabric below.


Cut the following:
Front chest piece: Cut one 2" x 6 1/2" (also cut the same out of your lining fabric)
Back chest piece: Cut two 2" x 4" (also cut the same out of your lining fabric)

Skirt: cut one 7" x 22"
Straps: cut two 5" pieces of ribbon
OR you can cut two pieces of fabric 2" x 5" for the straps also.

Bottom Band of the skirt: cut one 3" x 22"

Your pieces should look like this now:

First, lay your two back chest pieces right sides together along with the lining pieces.
Cut a small quarter circle out of ONE corner-this will be the armpit part.
If you need to trace something a cup/glass works well.


Next, fold your front chest piece in half (and the lining) and do the same.
They should look like this:


When laid end to end, you should have what looks like 2 half circles, where the arms will go.


Now, take pieces of the pieces of your "pretty" fabric and put them right sides together.
Pin and sew the left and right sides.
Do the same for the lining.
Press the seams open when done.


 Lay the pretty fabric and the lining on top of each other and sew the underarm part.
It's the part that looks like a half circle.

Now pin the straps in place.
Pin them about an inch in from the corner.
Make sure to not twist the strap as you are pinning.
Sew along the side, top and down the other side of the chest pieces.


Turn right side out and press, as well as gently poking out your corners.


Then topstitch.
You don't have to topstitch but it makes it look a lot nicer when finished!

Next, attach the skirt band to the skirt.
Place right sides together and pin.
Sew them together, and then zig zag the seam or use a serger to finish it.
Press and then topstitch if you want to.


 Now, hem the bottom of the skirt.
Press up 1/4" and then 1/4" again.
Sew.


Now fold in the sides of your skirt piece.
Fold over and press 1/4" and then 1/4" again.


Sew this down.


Next, you need to do a gathering stitch at the top of the skirt piece.
Then lay the chest part on top of the skirt (right sides together) and pull your gathering threads until they are about the same width.
Pin along the entire width of it.
Then sew it down.
Serge or zig zag this seam.


When you turn it over it should look almost done!


Attach the velcro.
I cut a 1 1/2" strip for the chest part and then a 6" piece for the skirt part.
You could also use snaps here or buttons or whatever you choose!


Now try it on Nellie/Julie/Samantha, etc and see your little girl's eyes light up!
Peighton's sure did-she has a bunny dress to match which always makes her smile!

The dress Nellie is wearing in the first picture of this post has a little flower rosette on it.
It's super quick to  make and gives a nice detail to any dress!
Watch for that tutorial to come-mostly because I didn't take pictures this time!

Wednesday, February 23, 2011

Boys Romper!

I am finding that making things for my little guy is SO FUN!


Making stuff for girls is easy. 
There are a million and one different things to make for girls.
Dresses, skirts, leggings, shoes, necklaces, bracelets, little girly toys, blankets and on and on and on.
I have probably made most of them. And loved every ruffle and bow that I sewed.

But it's quite a challenge to find something cute for the little boys.
Things that aren't actually for girls but they made it in a "boyish" fabric and tried to pass it off as "this is for boys too!"
Nope.  Not buyin it. You can't fool me.

When I saw this tutorial for a BOYS romper I just about squealed with excitement! 
SO CUTE!
I love dressing Preston in knit one piece rompers.
Makes changing diapers super fast and they don't ride up like t-shirts do.
Had to have one. NOW.

My grand plan is to take these:

and make them into this style of outfit.
How much do I love the middle one that says
"I farm. You eat."
Perfect.
I'm thinking that even the orange striped Polo one might make a good summer romper.

Anyway, I had this pattern for a raglan T that I've used a few times for shirts for Peighton.
It's cute and I like the raglan style.
So, I used that one instead of the one that is used in the tutorial.

Here is what my process looked like (and it was actually pretty quick!):


I used the raglan pattern to do the top part and then layed down one of Preston's 6-12 month rompers from the Gymboree under the pattern to get the leg part right.

These are my front and back pieces.
I also saved some long strips that were scraps from cutting the big pieces. 
At this point I wasn't sure how I was going to do the leg openings and thought those might come in handy-they did!

The arms were cut right from the raglan pattern as well as the neckline.
Then I put it together according to the directions.

I hemmed the front part of the leg opening.
For the back, I attached one of those strips folded in half. I might do this for the front next time as well.
We'll see how this one turns out!

So far it is perfect, the legs are a bit long according to the gymboree romper but I do still have to hem them.
That will be last after the snaps are added.

Which brings me to my next step...but I don't have snap pliers!
I do have a snap press, but it applies colored resin snaps and I really want the metal ones for this.
Guess I have to go to the store!!!

I will update with a picture of my little guy wearing this once I get the snaps on!

I think when I make another one, I am going to use a solid color for the body part and the printed one for the sleeves. 
Then I am thinking I could do some sort of applique/shape/letter on the front in the same fabric as the sleeves.


UPDATE:
Got my snapping tool.
Went to work attaching snaps...with this crazy tool....and a hammer.

There were a lot of words I don't normally say spoken as I proceeded to try to put these snaps on!
I ruined quite a few of the snap pieces before getting it right-good thing I bought plenty!
I must say I have a newfound appreciation for all onesies, rompers, etc that have snaps on them!

I made a big mistake with the very first snap I put on.
I put it on the opposite way that I intended to put it on....which led to swear word # 1.

Once you put a snap on though you're kind of commited and I couldn't change it.
So, I just went with it and continued knowing that it was going to be backwards!

Many tries later and quite a few of the pieces tossed into my trash can I did get it finished and then hemmed the bottom.
It is cute.
And I'm probably the only one that will actually see the mistakes.


This picture is not much different than the last, but the legs are done.
I need to put it on my little guy and then take a picture!

The next one will be better.
I just found the pliers I wanted at Amazon!  They look MUCH easier to use than my hammer thing!
I can't wait to make another!

Saturday, February 19, 2011

Men's Shirt to Child's Dress!

I went to Goodwill in search of some fun men's shirts to make into dresses for Peighton.


I had seen this tutorial on the Made blog and thought what a great idea and so inexpensive, not to mention a great way to recycle!
I picked up this purple one and a really cute orange and white striped one that I thought would turn into some fabulous dresses!

I started with a pattern that I already had and liked.  Probably could have done it with just a shirt of Peighton's though too.

Oops. This one is upside down!  But you can see all my pieces.  I cut the turquoise knit off another shirt to use as a waistband and give it a little pop of color.

 When I got to this point I thought how cute the bottom part would be as a skirt!  Next time.

It turned out so cute!  I have since added a little flower rosette to the middle with a little button in the center. I thought it needed a little something. 

What a fun summer dress this turned out to be!

I loosely used the directions on MADE for this one although I did the waistband with knit on mine.  I think on my next "Shirt to Dress" project I am going to try doing the waistband on top of the dress as she did in her tutorial!

I also picked up about 10 other shirts while shopping at the Goodwill-I can't wait to start cutting them apart too!

Sunday, February 13, 2011

The Floor Nanny

This crazy thing called The Floor Nanny came through my inbox one day from one of those supersaver baby sites.  (I'm not sure they really save me money because I seem to be a sucker for kid gear and simply MUST have things that look fun and useful-especially when they tell me it's on sale!!!!) 
Anyway, it looked useful and pretty cool-until I saw the price tag!  The main part is $75 and the slipcover is another $35!  And all it is is a stuffed square of fabric!!!!!  Thought to myself....I can totally do this.

And I did.  The dimensions of the real one are 38 x 38.  I bought enough fabric to make a perfect square when folded on the bias. Most fabrics are about 45" wide, so I bought 45" of two fabrics. I did one flannel, one just quilting cotton so that it's reversible of course.

I made this a few months back so I did not take pictures of the process, but really it's pretty straight forward.

I took my squares of fabric, put right sides together and sewed around the entire square leaving an opening for turning and eventually stuffing.

Then, turned right sides out and pressed.
Next, I measured in 8" from each corner and marked a dot-this was to make the inner square that makes the "floor" part of the floor nanny.  Another way to do this is to make an 8" square out of paper, put it on each corner and mark the inner point.

Next, I connected my 4 inner dots to make my inner square.  I used a fabric marker and a yardstick because I wanted it to be as straight as possible and I don't always sew straight!

I sewed that square all the way around leaving no opening, this does not need stuffing.

Next, I stuffed the entire outer part through the hole I left.  THis was a bit hard-it's hard to get your arm in all those angles!!!!  I stuffed it pretty full because I wanted it to support the baby well while he was learning how to sit.  Once it was stuffed to my liking I closed up the opening and it was done!

I did not make a slipcover for it.  Just didn't want to.  I figured I have so many big baby blankets (who doesn't have like 20 or so of them?!?!?!) that I can just throw one of those over it and that's what we do-works great!

 He loves it!  It's nice that it's not as restrivtive as the Boppy-which we use too-but this is a bit better.
He's getting better at sitting but still does his share of flopping over, but that Floor Nanny cushions his fall every time!  And instead of crying he just smiles or plays on his back for awhile.
 I pulled the blanket back in this picture-you can see how the middle square I sewed is well defined here.

 It keeps all his toys right there beside him too! Bonus.

It's even good for lounging!  Man he's cute too.

I also whipped up a smaller one for traveling to Grandma's house, friends houses or just to use on a different floor of our house! We love it!!!

Monday, February 7, 2011

Ouchie Bag

Anyone else's kid addicted to band-aids?  Mine is.  There aren't too many days around here where we don't require at least one (probably more) band-aids to make the ouchie go away. 

I saw the idea for an "ouchie bag" somewhere-really can't remember where, I should bookmark these things!

Pretty simple though, and a great beginning sewing project!

Supplies
2 scraps of fabric (5 x 5 to be exact)
Rice
Extra fabric, buttons, pretty things, etc  for embellishments

Put your 5 x 5 squares right sides together.

Sew around the edge leaving about a 2 inch opening for turning and for filling with rice.

Turn it right side out.

Press.

Fill with rice.  Don't stuff it full-then you won't be able to sew it shut!

After you have the rice in, sew the opening closed, making sure to backstitch at both the start and the stop.

I used a scrap of minky on one side-I thought that would be soft on the ouchie.
And yes, I know that the heart is not centered...my crafty little helper wanted it "right there." Ok, whatever.


Now, leave it in the freezer and use it multiple times a day to help the Ouchies go away!!!!

Peighton is loving hers.  She gets it out of the freezer quite frequently for all of her ouchies....and all of her drama. ;-)